💥 Install Windows 11 on Mac (Apple Silicon - M1, M2, M3, M4)
A complete and updated guide to installing Windows 11 on your Apple Silicon Mac (M1, M2, M3) using UTM (free). Perfect for developers, students, or anyone needing Windows on a Mac.
📚 Table of Contents
🚀 Why Install Windows 11 on Apple Silicon?
- Run Windows-only software on macOS.
- Use Microsoft Office, games, or enterprise tools.
- Test apps across platforms.
- Lightweight and fast with virtualization.
- For ethical hacking labs, hacking.
🧰 What You’ll Need
- An Apple Silicon Mac (M1, M2, M3 or M4 chip)
- Windows 11 ARM ISO or VHDX
- UTM (Free)
- At least 25GB of free disk space
🔽 Download Requirements
✅ Download UTM
- Go to the official UTM website: https://mac.getutm.app/
- Click the “Download” button to get the latest version.
- Once downloaded, move UTM.app to your Applications folder.
- Open UTM and allow permissions if prompted by macOS.
✅ Download Windows 11 ARM ISO
The easiest way to get the Windows 11 ARM ISO is by using the CrystalFetch app from the App Store:
- Open the App Store on your Mac.
- Search for CrystalFetch or use this link: CrystalFetch on App Store
- Download and open CrystalFetch.
- For the options, Choose:
- Version: Windows 11
- Build: Latest
- Architecture: Apple Silicon
- Language: English (United States)
- Edition: Windows 11
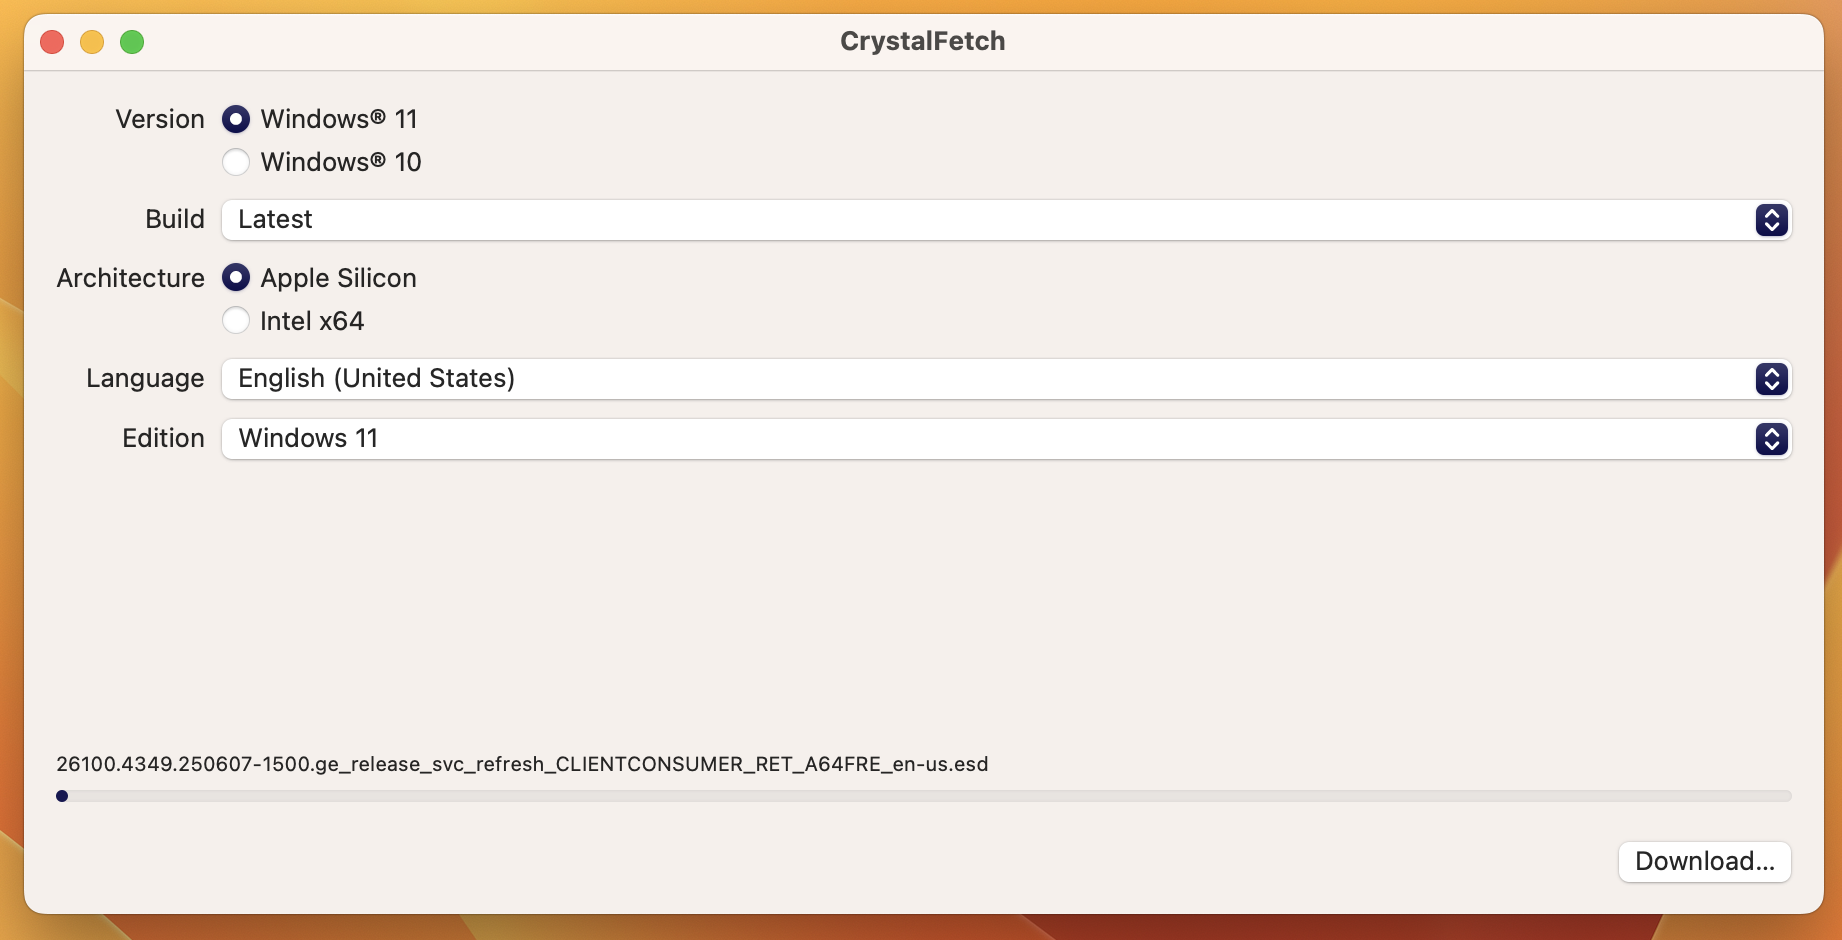
- Click Download ISO and wait for it to complete.
- Save the ISO file somewhere accessible (like your Downloads folder).
Note: Because of the large file, Windows 11 ARM ISO may take about 1-2 hours to download depends on your network connection.
| 💡 CrystalFetch downloads the ISO directly from Microsoft’s servers—safe and easy!
⚙️ Step-by-Step Installation (Using UTM)
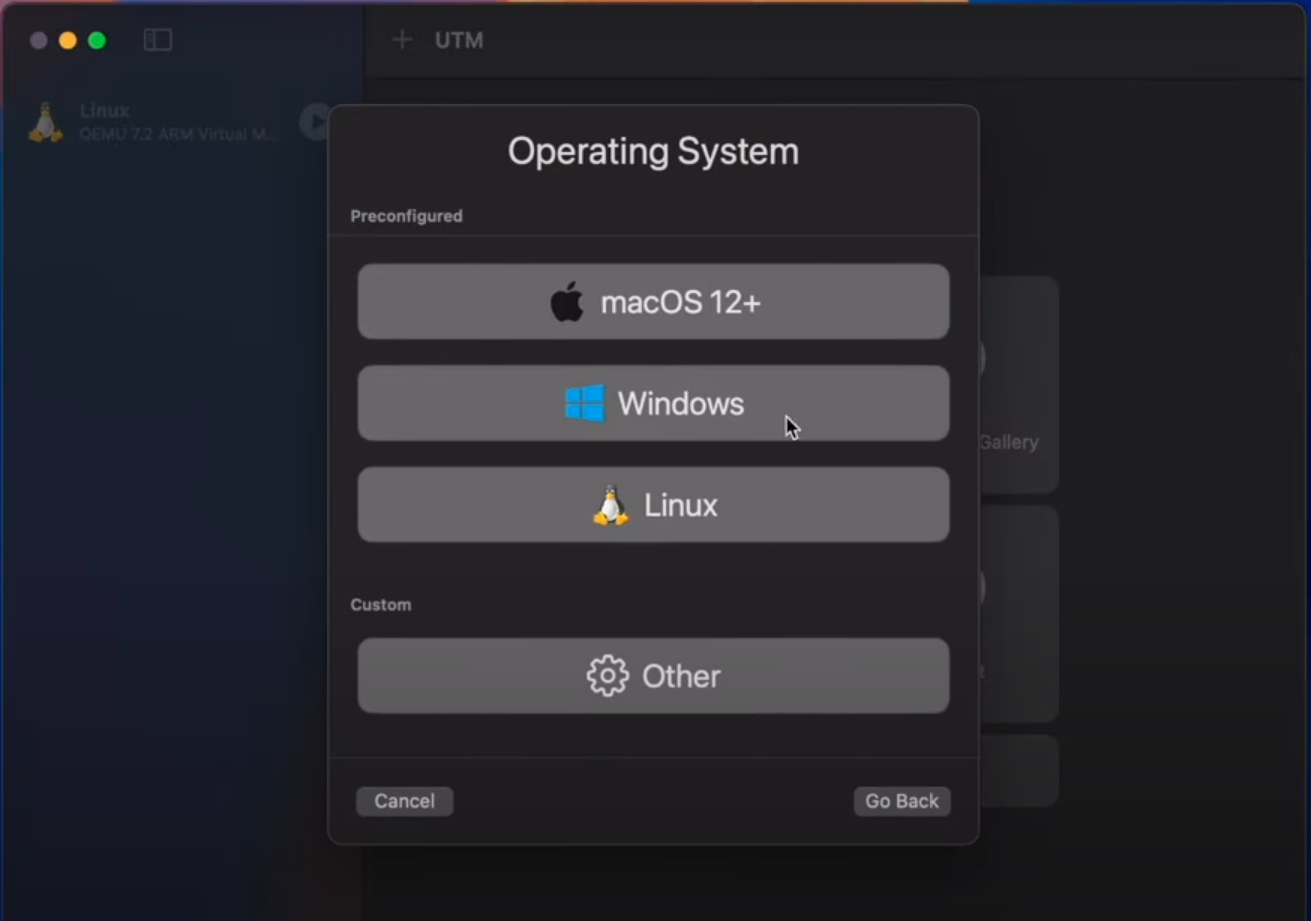
1. Open UTM and Create a New VM
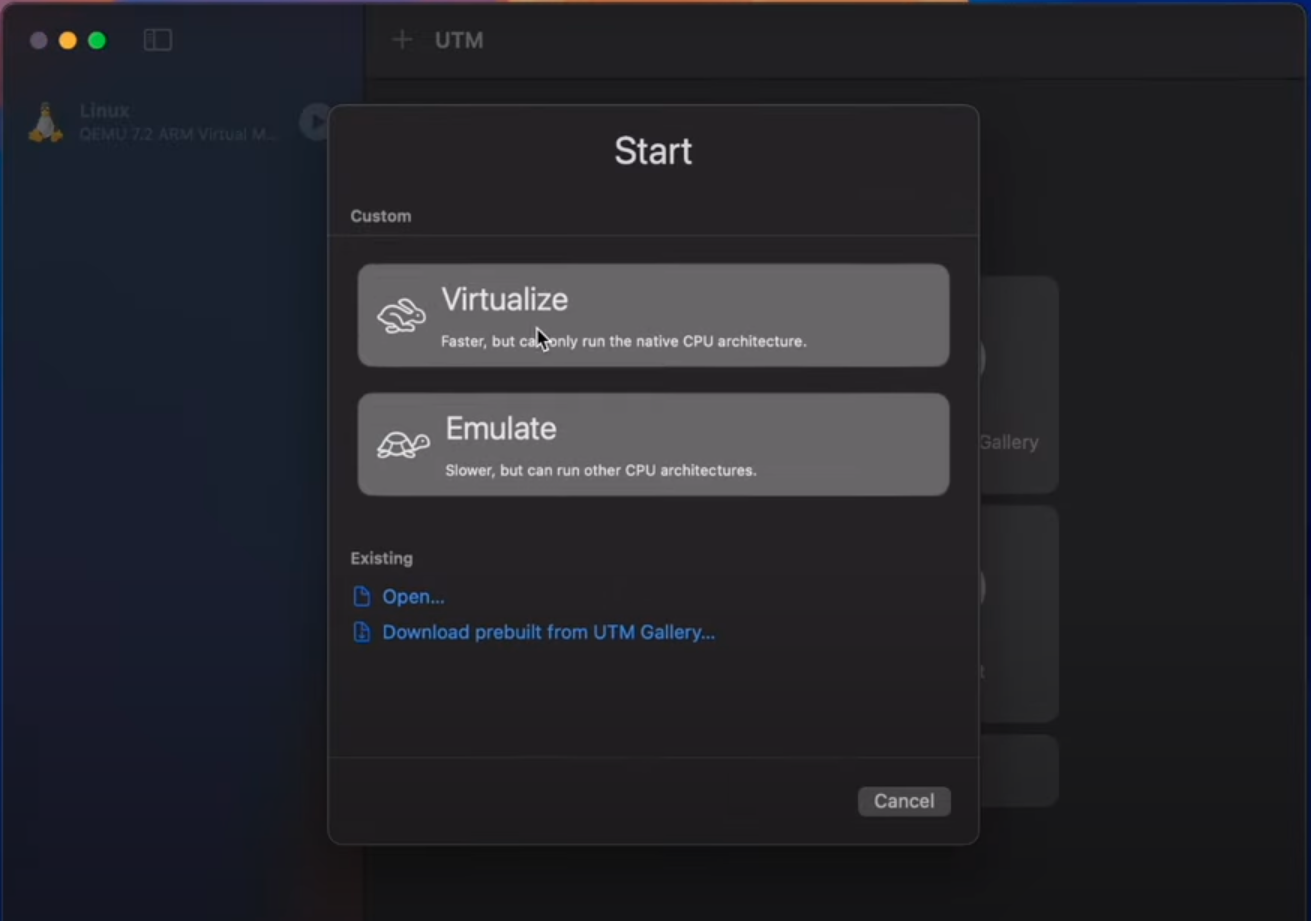
- Click Create a New Virtual Machine.
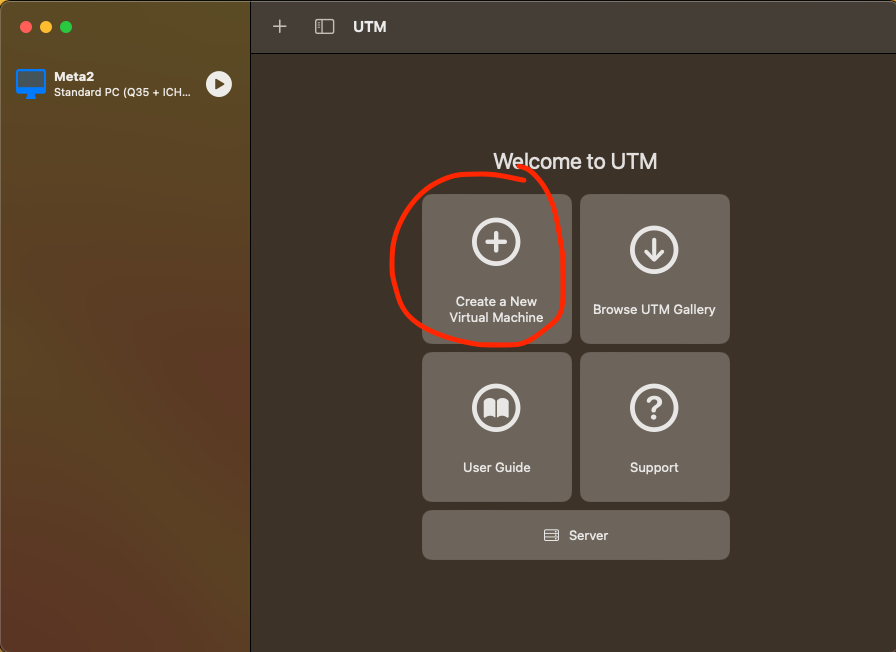
- Select Virtualize.
- Select Windows.
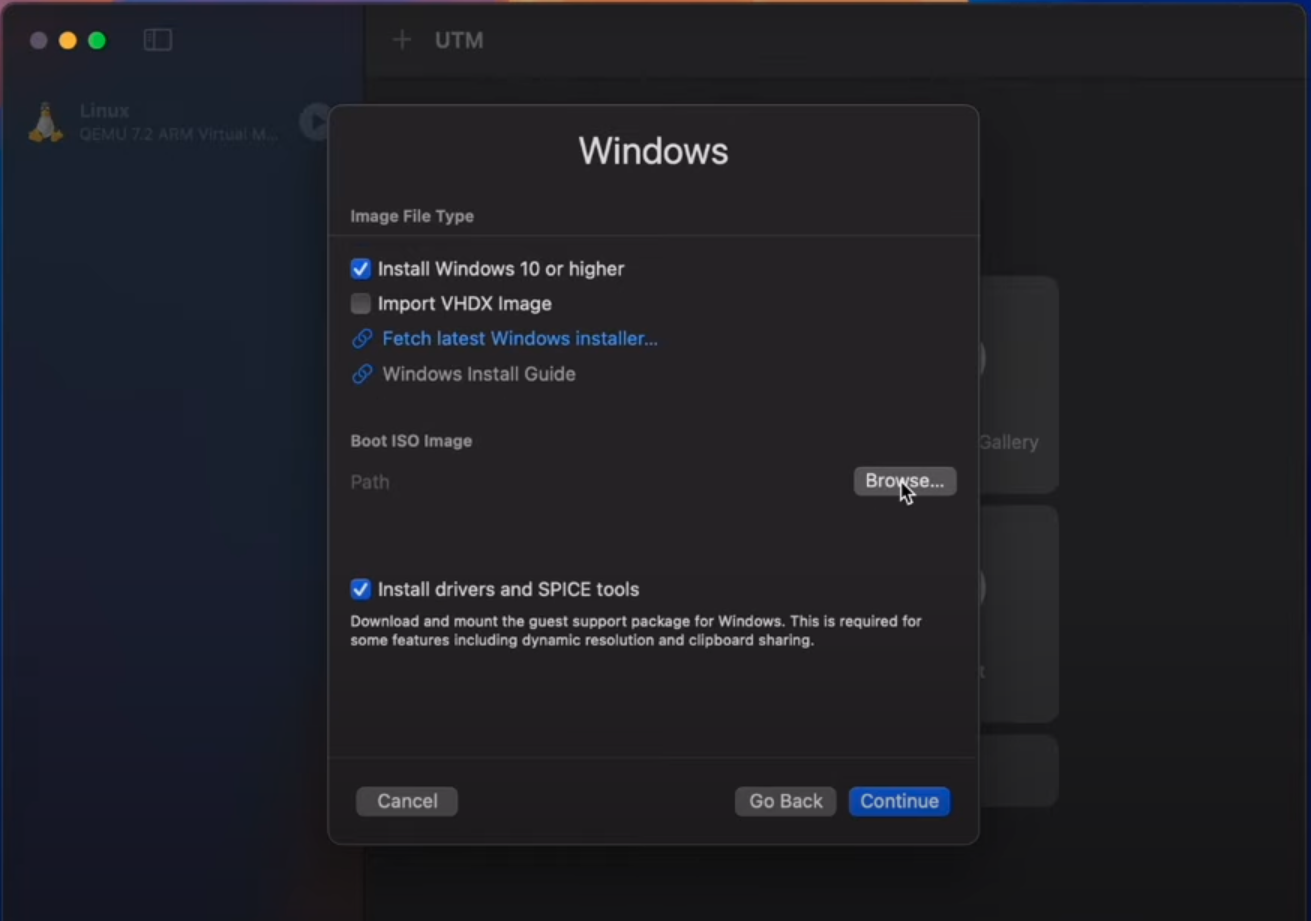
2. System Configuration
- Check on Install Windows 10 or higher.
- Click Browse then choose the Windows 11 ISO you have installed.
- Choose 4096 MiB for Memory (this is the minimum amount).
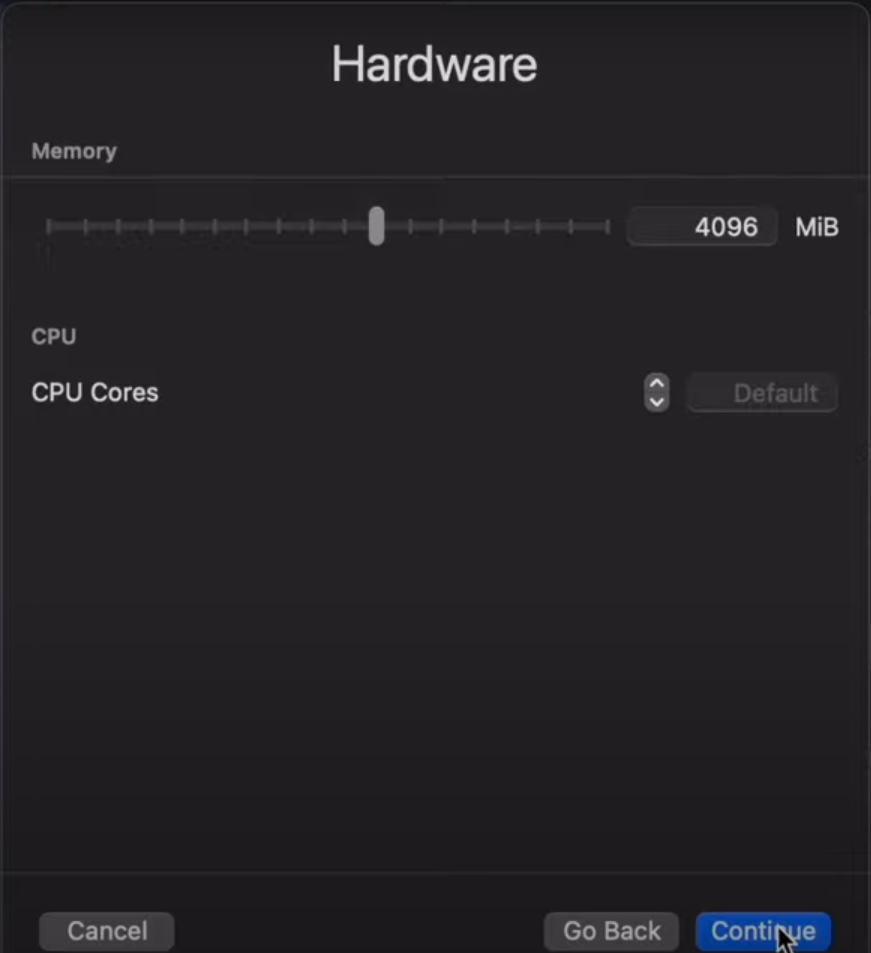
- Choose 64 GiB for Storage.

- Click Continue -> Continue -> Save.
- Run the VM Windows.
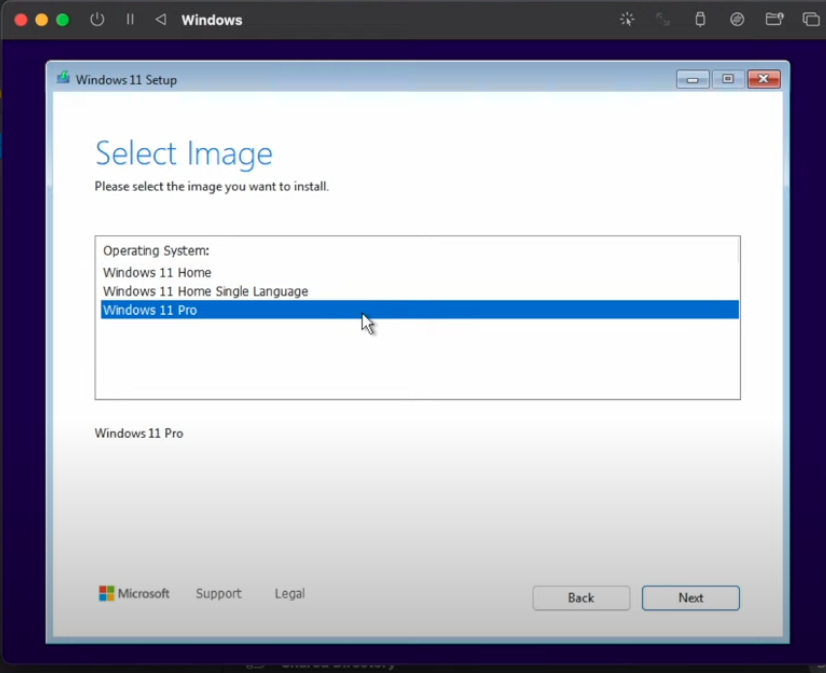
3. Windows Settings
Select I don’t have a product key.
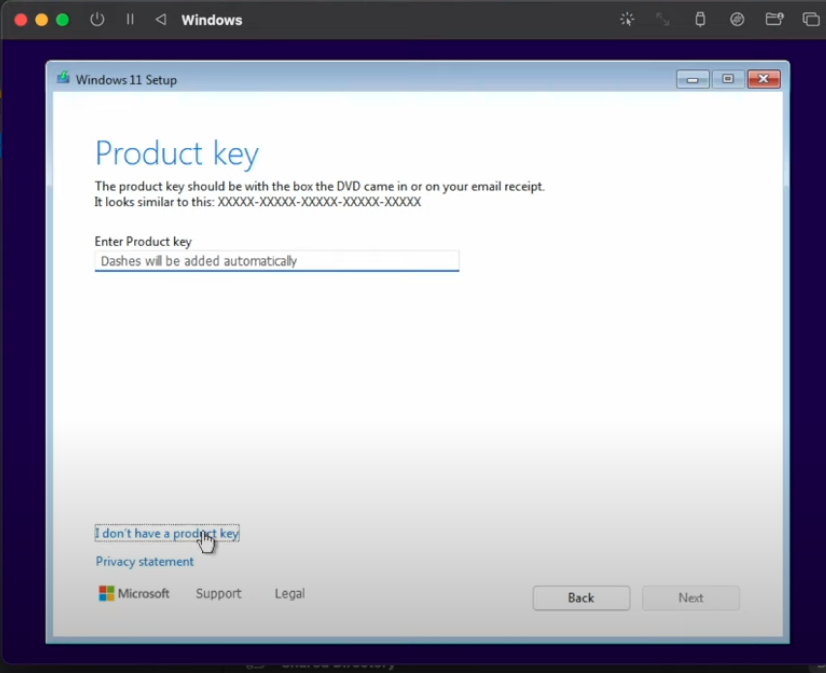
Select Windows 11 Pro -> Next.
Then just wait for Windows update and you have completed install Windows on Mac Apple Silicon.
📄 Useful Resources
📢 Support & Contributions
Feel free to open an issue or submit a PR if you want to improve the guide!
📌 Keywords (for SEO)
install windows 11 on m1 mac, windows 11 arm mac, windows 11 apple silicon, utm windows 11, parallels m1 windows, windows 11 vm mac m2, mac m3 install windows